 Save
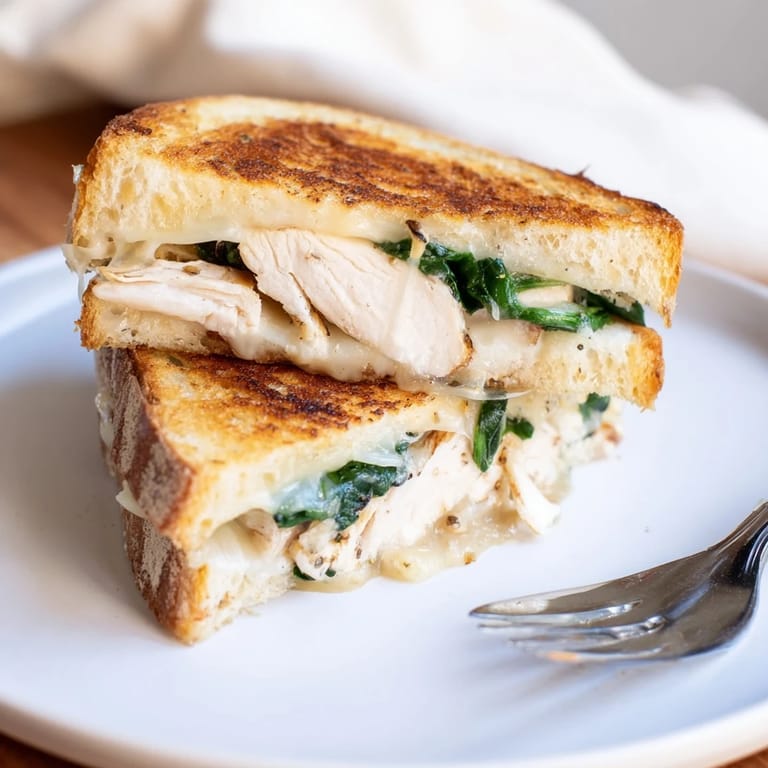
Save There was a Sunday afternoon when I had leftover grilled chicken and not much else in the fridge. I spotted spinach wilting slightly and a block of mozzarella that needed using. Instead of tossing things into a salad, I grabbed the panini press my sister gave me years ago and decided to experiment. The smell of garlic butter hitting hot bread filled the kitchen, and I knew immediately I'd stumbled onto something worth repeating.
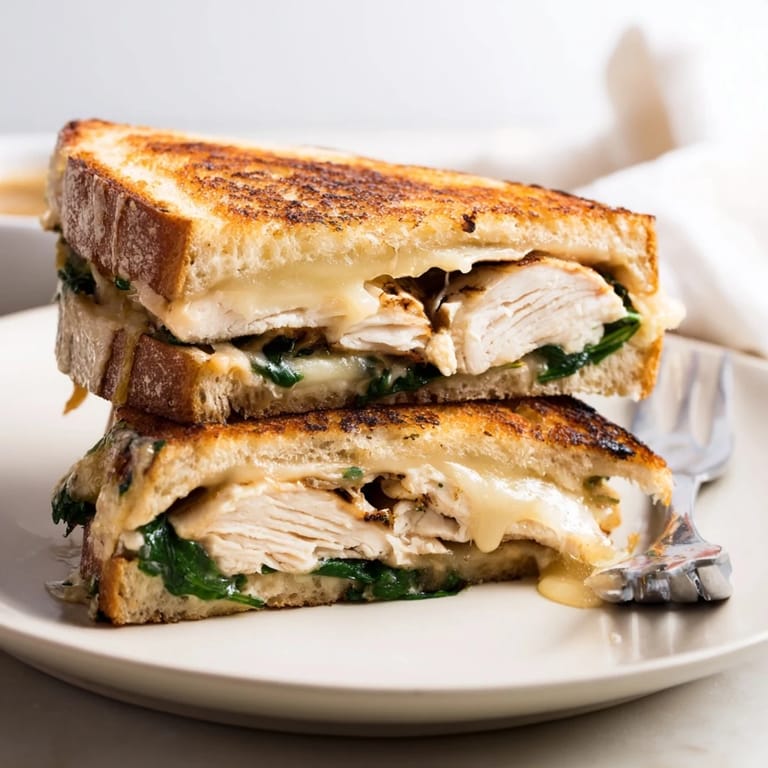
I made these panini for friends who dropped by unexpectedly one evening. They watched as I pressed the sandwiches, cheese oozing slightly at the edges, and someone said it smelled like an Italian deli. We ate them standing around the counter, laughing and talking, and I realized how a simple sandwich can turn into a moment people remember.
Ingredients
- Boneless, skinless chicken breasts: Grilling them with Italian herbs gives a savory base that holds up to the strong flavors of garlic and cheese, and slicing them thin ensures every bite has protein without overwhelming the bread.
- Olive oil: Brushing it on the chicken before grilling keeps the meat moist and adds a subtle richness that complements the garlic butter.
- Salt, black pepper, and dried Italian herbs: These seasonings create a classic, aromatic crust on the chicken that tastes like something you'd get at a good deli.
- Unsalted butter: Softened butter mixed with garlic and parsley becomes the golden, fragrant layer that crisps the bread to perfection.
- Garlic cloves: Fresh minced garlic brings a punchy, warm flavor that mellows as it toasts, making the whole panini smell incredible.
- Fresh parsley: Finely chopped parsley adds a bright, herbal note to the butter that keeps the richness from feeling heavy.
- Rustic Italian or sourdough bread: Sturdy slices hold up under the press and develop a crispy exterior while staying soft inside, which is exactly what you want in a panini.
- Fresh baby spinach: Washing and drying it well prevents sogginess, and its mild, slightly earthy flavor balances the richness of the cheese.
- Shredded mozzarella cheese: It melts beautifully and creates those satisfying cheese pulls, and you can swap in provolone if you want a sharper bite.
- Grated Parmesan cheese: A little Parmesan adds a salty, nutty depth that makes the filling taste more complex.
- Olive oil for brushing: A light brush on the pan or press prevents sticking and adds an extra whisper of flavor to the crust.
Tired of Takeout? 🥡
Get 10 meals you can make faster than delivery arrives. Seriously.
One email. No spam. Unsubscribe anytime.
Instructions
- Get the grill ready:
- Preheat your grill pan or outdoor grill to medium high heat so it is hot enough to sear the chicken and lock in the juices. A properly heated grill gives you those beautiful char marks that add flavor.
- Season and grill the chicken:
- Brush the chicken breasts with olive oil and season both sides with salt, pepper, and Italian herbs, then grill for 5 to 6 minutes per side until cooked through and no longer pink in the center. Let the chicken rest for 5 minutes before slicing it thinly so the juices redistribute and every slice stays tender.
- Make the garlic butter:
- In a small bowl, mix the softened butter with minced garlic and finely chopped parsley until everything is evenly combined. This fragrant butter is what makes the bread golden and irresistible.
- Prep the bread:
- Lay out all 8 slices of bread on your work surface and spread the garlic butter on one side of each slice. The buttered side will face outward when you assemble the sandwiches.
- Build the panini:
- On the unbuttered side of 4 bread slices, layer sliced grilled chicken, fresh spinach, shredded mozzarella, and grated Parmesan, then top with the remaining bread slices with the buttered side facing out. Press down gently so everything holds together.
- Press and cook:
- Heat your panini press or a large skillet over medium heat, place the sandwiches in the press or skillet (using a heavy pan to weigh them down if you are using a skillet), and cook for 3 to 5 minutes per side until the bread is golden brown and the cheese is melted and gooey. Watch closely so the bread does not burn.
- Slice and serve:
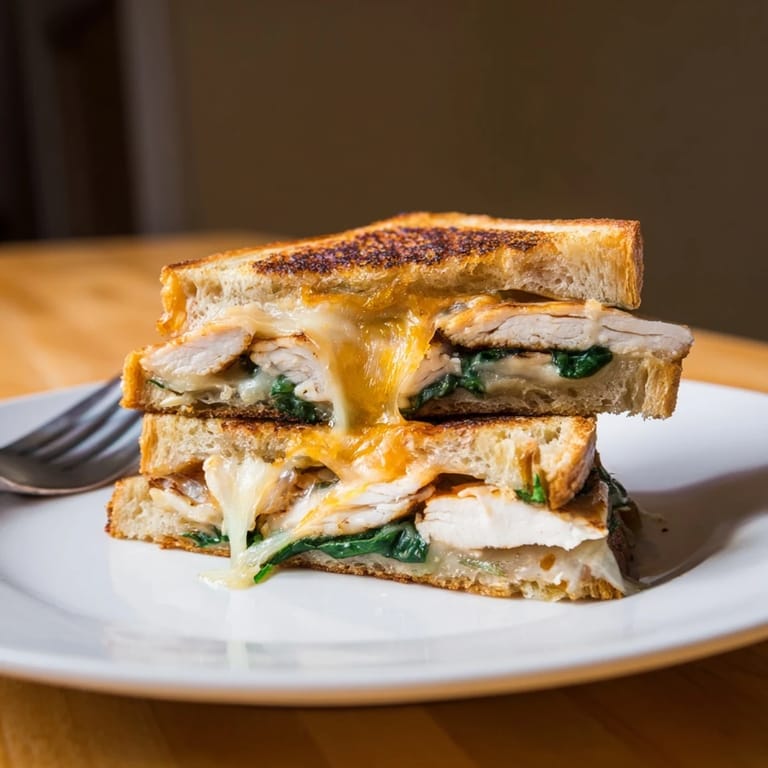
- Remove the panini from the heat, slice each one in half diagonally, and serve hot while the cheese is still melty. The diagonal cut makes them easier to eat and looks more appealing on the plate.
 Save
Save One evening I made these for my neighbor who had just moved in and did not have her kitchen set up yet. She took a bite and said it tasted like comfort, and I realized that is exactly what a good panini should be. It is not fancy, but it is warm and satisfying, and it reminds you that simple food made with care can mean everything.
Choosing Your Bread
The bread you pick makes or breaks a panini. Rustic Italian or sourdough both have a sturdy crumb that holds up under pressure without turning into a flattened mess. I learned this after trying soft sandwich bread once and watching it compress into a sad, dense layer. Look for slices that are about half an inch thick so they crisp on the outside while staying tender inside. If your bread is too thick, it will not press well, and if it is too thin, it will burn before the cheese melts.
Swapping and Adding Ingredients
You can easily swap turkey breast for chicken if that is what you have on hand. I have also added sliced tomatoes and roasted red peppers when I wanted extra flavor and a bit of sweetness to balance the garlic. Some people like to spread pesto or Dijon mustard on the inside for an extra layer of taste. Just remember not to overload the sandwich or it will fall apart when you press it.
Serving Suggestions
These panini pair beautifully with a simple green salad dressed in lemon vinaigrette or a bowl of warm tomato soup for dipping. I have served them at casual lunches and even cut them into smaller pieces for appetizers at gatherings. They are just as good with a handful of kettle chips on the side or some pickles for a tangy contrast.
- Serve with a crisp arugula salad tossed in olive oil and balsamic vinegar.
- Pair with a creamy tomato basil soup for dipping the crispy edges.
- Add a side of sweet potato fries or roasted vegetables for a heartier meal.
 Save
Save This panini has become one of those recipes I turn to when I want something satisfying without spending an hour in the kitchen. It reminds me that good food does not have to be complicated, just thoughtfully made.
Recipe FAQs
- → Can I prepare the panini ahead of time?
You can assemble the panini up to 2 hours ahead, but refrigerate it without pressing. Press and cook just before serving for the best texture and melted cheese.
- → What type of cheese works best?
Mozzarella and Parmesan are ideal for melting and flavor, but provolone, fontina, or a combination of Italian cheeses works wonderfully. Choose cheeses that melt smoothly for best results.
- → How do I get the bread perfectly golden and crispy?
Brush the outside of the bread with olive oil or spread garlic butter on both outer sides. Cook on medium heat in a panini press or skillet for 3-5 minutes per side until golden brown and crispy.
- → Can I use a regular skillet instead of a panini press?
Yes, absolutely. Place the assembled panini in a preheated skillet and weigh it down with a heavy pan, cast iron, or panini weight while cooking to achieve that pressed sandwich texture.
- → What are good serving suggestions?
Serve alongside a simple green salad, tomato soup, or fresh vegetable sides. A crisp white wine or sparkling water complements the flavors beautifully.
- → Can I substitute the chicken?
Turkey breast is an excellent substitute for a leaner option. Grilled vegetables like eggplant or zucchini work for a vegetarian version using the same preparation method.