 Save
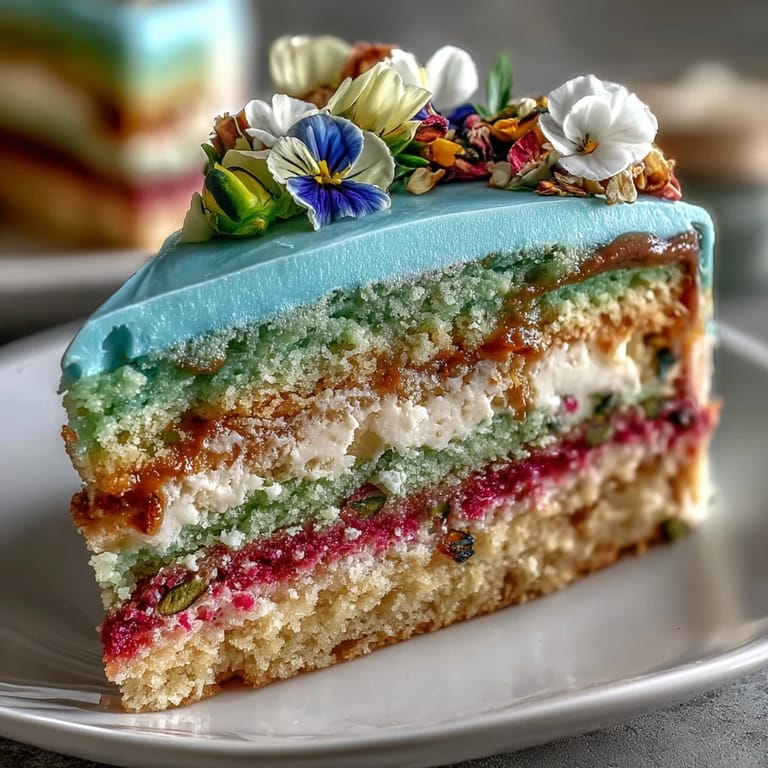
Save The first time pastel ombre cake became a kitchen adventure for me, sunlight was streaming in and flecks of flour dusted my countertop. With each swirl of food coloring, the bowl blossomed into something almost magical, as if spring itself had snuck indoors. My playlist was humming quietly in the background, and I kept pausing just to marvel at the gentle hues forming in each layer. Occasionally, a stray flower would leap off the cutting board, a cheerful reminder not to take myself too seriously. Somehow, making this cake always feels like a celebration, even when it’s just a Tuesday afternoon.
When I brought this cake to a spring brunch, the room seemed to twinkle as everyone gasped at the ombre colors and edible flowers crowning the top. Cutting into those layers was a moment that felt almost ceremonial, and my cousin confessed she’d never seen anything quite so pretty on a dessert table. Later, as crumbs disappeared and coffee was poured, someone asked if I had used real flowers—it sparked a lively conversation about botanicals and baking mistakes that turned strangers into friends.
Ingredients
- All-purpose flour: Make sure to sift for a tender crumb; I learned that clumps can ruin the color gradient.
- Baking powder & baking soda: These help the cake rise evenly, especially important for getting those layers tall and majestic.
- Salt: Brings out the depth of flavors and keeps the sweetness balanced.
- Unsalted butter: Always use room temperature for smooth mixing; cold butter will leave streaks and lumps.
- Granulated sugar: Thoroughly creaming it with butter gives the cake a lighter texture.
- Eggs: Room temperature eggs blend in effortlessly, avoiding curdling—a lesson after a few failed batches.
- Vanilla extract: Don’t skimp; it rounds out all the pastel flavors and scents.
- Whole milk: Room temperature keeps the batter from seizing, which is especially crucial when dividing and coloring.
- Gel food coloring: The colors stay vivid without thinning the batter or frosting.
- Powdered sugar for buttercream: Sifting beforehand means airy, lump-free icing.
- Heavy cream or whole milk for frosting: Adjusting the liquid helps you get just the right consistency.
- Edible flowers: Seek out organic, pesticide-free varieties—sometimes friends gift me garden blooms and it always feels extra special.
Tired of Takeout? 🥡
Get 10 meals you can make faster than delivery arrives. Seriously.
One email. No spam. Unsubscribe anytime.
Instructions
- Prep the pans and oven:
- Line your cake pans with parchment—when I rush this step, the cakes always stick, so take a second to do it properly.
- Mix dry ingredients:
- Whisk together flour, baking powder, baking soda, and salt; the kitchen will already start to smell slightly nutty.
- Cream butter and sugar:
- Let the mixer run until the mixture is pale and fluffy, tapping your bowl gently to loosen any sugar from the edges.
- Incorporate eggs and vanilla:
- Add eggs one at a time, watching the batter turn glossy, and finish with a swirl of vanilla.
- Blend flour and milk:
- Alternate additions so the batter stays smooth—if it looks lumpy, pause and scrape the sides.
- Tint and bake:
- Divide the batter into three bowls and color each gently; I use toothpicks to control how much dye goes in. Pour into pans, and bake until centers bounce back lightly to the touch or a toothpick comes out clean.
- Buttercream magic:
- Beat butter and powdered sugar until cloud-like, then tint portions with pastel colors. Frosting is the part where mess is inevitable, but it’s half the fun.
- Layer and frost:
- Stack your cake, smoothing buttercream in between. Do a quick crumb coat, chill, then finish with ombre shades using a spatula or the back of a spoon.
- Decorate and serve:
- Just before guests arrive, gently press edible flowers into the frosting—you’ll find yourself arranging them with more care than you ever expected.
 Save
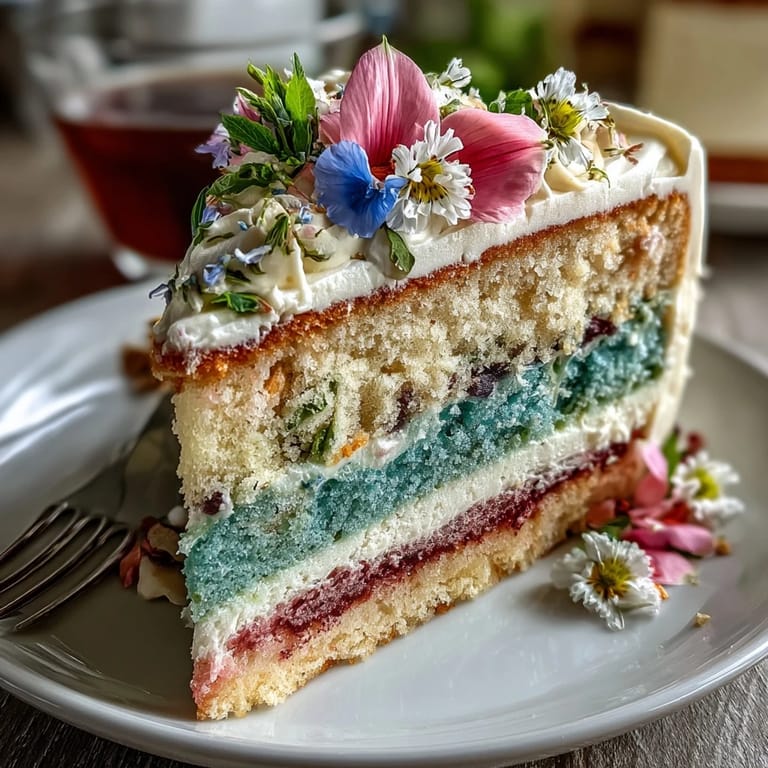
Save The day this cake made a little girl’s birthday, her smile rivaled the cake itself. It felt less like baking and more like gifting a story on a platter—everyone wanted to know how it was made, but the real magic was watching the flowers disappear one by one.
Creating Ombre Layers That Wow
Don’t rush when tinting the batter. I always mix gently and patiently, adjusting pastel shades until the bowls make me grin. Over-coloring can lead to murky tones, so sometimes I just let the colors settle naturally. My best results happened when I used a toothpick and added color drop by drop, stopping as soon as the pastel looked just right. It feels less like a recipe and more like painting with cake batter.
Buttercream: Getting It Smooth
Soft, room temperature butter is everything here—if it’s too cold, the frosting gets grainy and impossible to spread elegantly. I learned to sift powdered sugar for a texture that’s silkier than I expected. To get that ombre look, work quickly and blend gently where the colors meet, resisting the urge to over-swirl. If it starts to melt, chill the bowl for a few minutes and try again. Sometimes, using an offset spatula helps me sweep the colors beautifully together.
Decorating with Flowers: A Gentle Touch
Edible flowers are delicate—too much handling and they wilt, so I place them lazily and fix only what’s necessary. Always double-check your blooms for pesticides, and trim stems close for a neat finish. If you suddenly feel nervous about arranging, just breathe and let the colors lead. It’s okay if your pattern is imperfect; the flowers themselves do most of the work.
- Choose contrasting colors for drama and charm.
- Keep flowers chilled until just before decorating.
- Layer petals for intricate textures and visual depth.
 Save
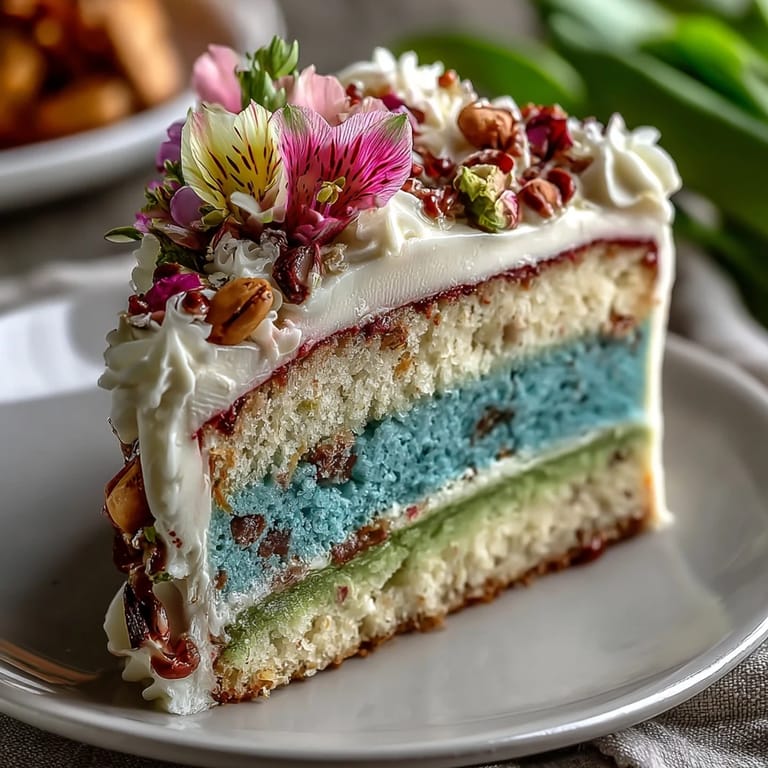
Save This cake always makes my kitchen feel brighter—share it with friends or keep it for yourself, and you’ll savor every pastel slice. The floral topper is just the invitation to celebrate spring in every bite.
Recipe FAQs
- → How are ombre coloring effects achieved?
Divide cake batter and frosting into portions before tinting with pastel gel food coloring for a gradient look.
- → What edible flowers are suitable for topping?
Pansies, violas, roses, and chamomile work well. Ensure all flowers are organic and labeled as edible.
- → Can the cake be made vegan?
Swap dairy, eggs, and butter for plant-based alternatives, including vegan milk, butter, and egg replacers.
- → What tools help assemble and decorate?
Use round cake pans, an electric mixer, spatulas, a wire rack, and a cake turntable for smooth frosting.
- → How to ensure cake stays moist?
Mix gently, avoid overbaking, and allow cake to cool before layering and frosting to maintain moisture.
- → Are there allergy concerns with edible flowers?
Some edible flowers may cause reactions. Verify suitability for guests and always choose organic blooms.