 Save
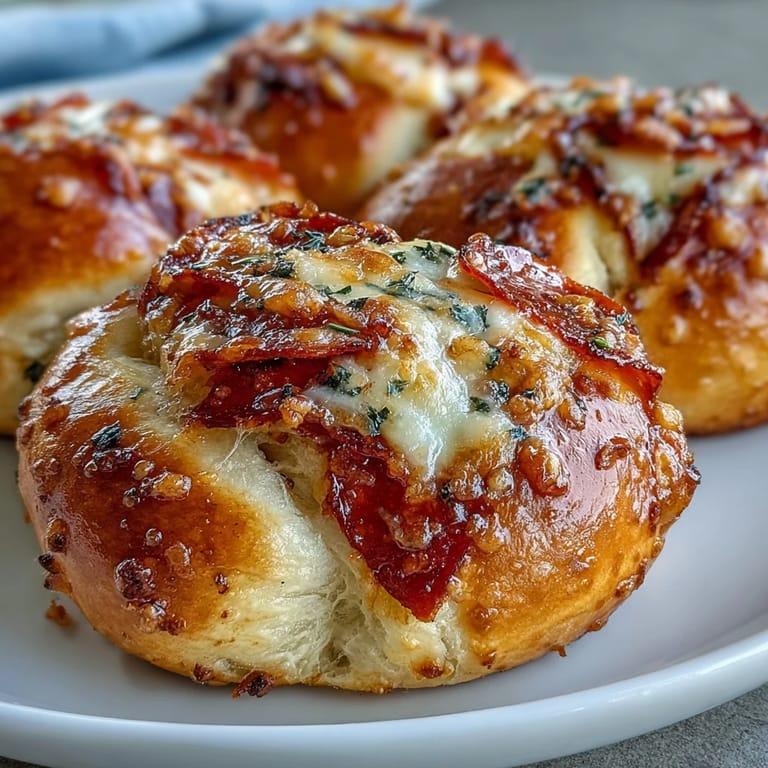
Save My roommate came home with a bag of pizza rolls one Tuesday night, and I watched her devour half the box while scrolling through her phone, barely tasting them. That same week, I'd been experimenting with Greek yogurt dough after stumbling onto it in a fitness blog, and something clicked—why not combine the two? What if I could make something that tasted like actual pizza, felt substantial and protein-packed, but looked like those fancy garlic knots from the Italian place downtown? The first batch came out golden and ridiculous, way better than I expected, and suddenly those store-bought rolls seemed pointless.
I made these for a Super Bowl party last year, and my friend Marcus—the guy who only eats pizza and wings—grabbed three without even asking what they were. By halftime he'd eaten eight. His wife looked at me like I'd revealed some culinary secret, which, in a way, I had. The whole situation felt a bit silly but also kind of perfect, proof that sometimes the most impressive dishes are the ones that don't try too hard.
Ingredients
- Self-rising flour: The unsung hero here—it already has salt and baking powder built in, so your dough rises without fussing, and I've found it creates a lighter, more tender crumb than all-purpose flour alone.
- Nonfat Greek yogurt: This is what makes the whole thing work; it binds the dough while keeping protein high, and honestly, you can't taste it at all, just get the texture benefits.
- Salt: Essential for bringing out the garlic and cheese flavors later, though don't skip it thinking the pepperoni adds enough seasoning.
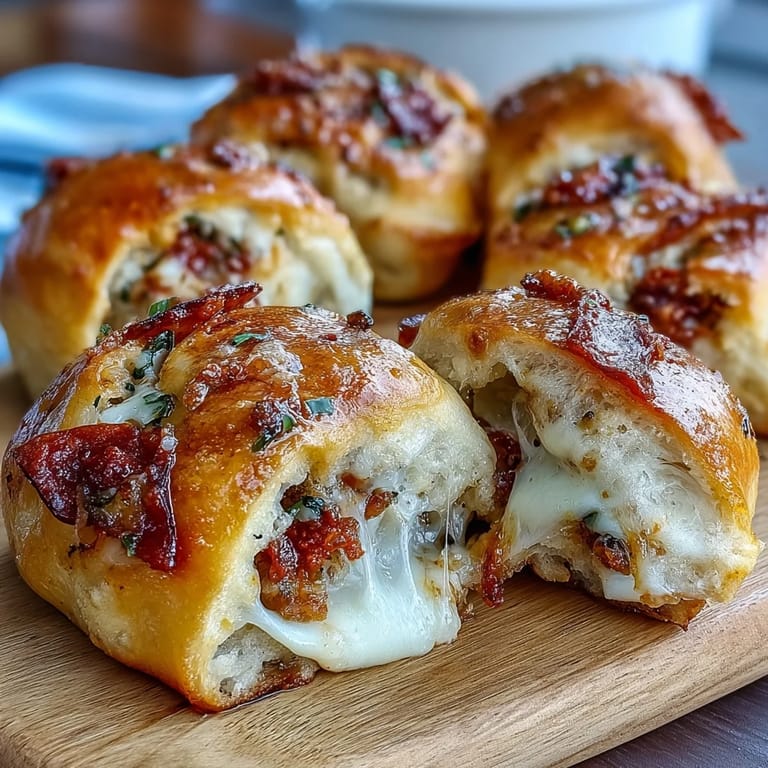
- Pepperoni slices: Buy the good stuff if you can—thin-sliced quality pepperoni crisps up beautifully in the oven, while cheap versions weep grease everywhere.
- Shredded mozzarella cheese: Freshly shredded works best if you have time, though pre-shredded is fine; just don't pack it too tight or it won't melt evenly.
- Unsalted butter: Gives you control over the final salt level and makes the garlic flavor shine without competing with excess salt.
- Fresh garlic: Minced fine, almost to a paste, so it distributes throughout the butter instead of leaving harsh chunks.
- Fresh parsley: Dried works in a pinch, but fresh adds a brightness that makes the whole thing taste less heavy.
- Parmesan cheese garnish: Optional but worth it—adds a subtle nuttiness and makes them look intentional rather than thrown together.
Tired of Takeout? 🥡
Get 10 meals you can make faster than delivery arrives. Seriously.
One email. No spam. Unsubscribe anytime.
Instructions
- Heat your oven and prep:
- Get the oven to 400°F and line your baking sheet with parchment paper so nothing sticks and cleanup becomes a non-event.
- Make the dough:
- Mix flour, yogurt, and salt in a bowl until it looks shaggy, then knead gently for just 2–3 minutes—overworking it makes the knots tough, which I learned the embarrassing way. The dough should feel soft but not sticky.
- Portion and shape:
- Divide into 12 pieces and roll each into a 7-inch rope; this is easier if your hands are slightly damp, almost like you're working with clay.
- Flatten into strips:
- Make each rope about 1.5 inches wide, thick enough to hold filling but thin enough to cook through without the outside burning.
- Fill with purpose:
- Place 1–2 pepperoni slices and a small pinch of mozzarella down the center—less is more here because too much filling prevents proper sealing and creates greasy spots. I learned this after my first explosive batch.
- Roll and seal:
- Roll each strip tightly lengthwise and pinch the seam shut like you're protecting a secret, then gently tie it into a loose knot and tuck the ends underneath so it holds together during baking.
- Arrange on the sheet:
- Place knots seam-side down so they don't unravel, spacing them about an inch apart to allow air circulation.
- Apply first garlic butter layer:
- Mix melted butter with garlic, parsley, and salt, then brush half of it over the knots before baking so the flavors infuse as they cook.
- Bake until golden:
- Watch them for 16–18 minutes until the tops turn a deep golden brown and you can smell the garlic from across your kitchen—that smell is how you know they're done.
- Finish and serve:
- Brush with remaining garlic butter immediately after removing from the oven while they're still hot, then sprinkle Parmesan if you want that extra touch. Serve warm before they cool down and lose their magic.
 Save
Save 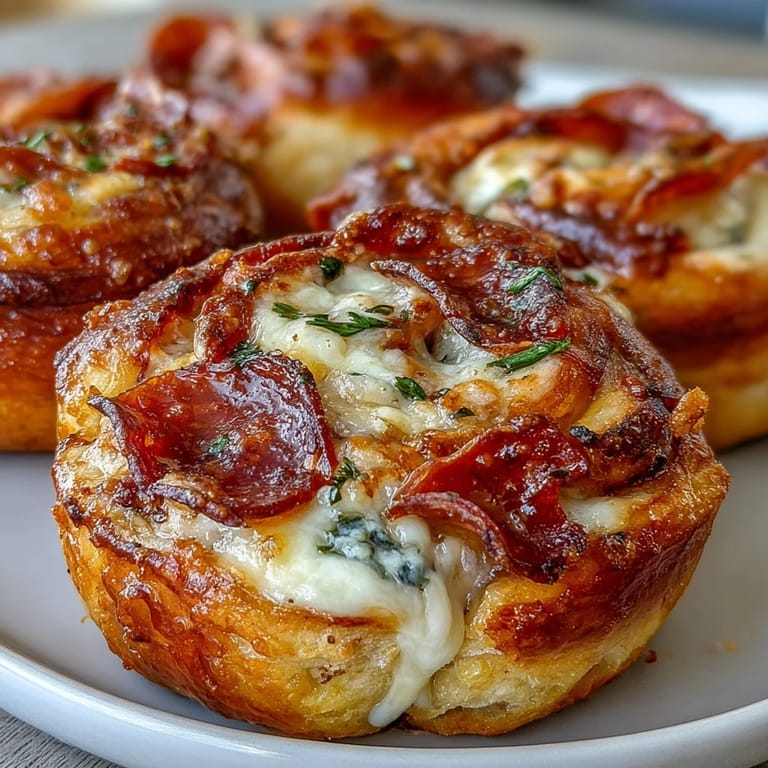 Save
Save There's something quietly satisfying about watching someone's face when they bite into one of these and realize the filling is inside, not on top or on the side like they expected. It's such a small thing, but it makes the whole experience feel more intentional, more like you actually thought about what you were making.
The Greek Yogurt Difference
The first time I used Greek yogurt in a savory dough, I was skeptical—wouldn't it taste weird, tangy, like dessert? But it doesn't, because the flavors around it are so strong that the yogurt just fades into the background, acting as a moisture agent and protein booster instead of announcing itself. The texture it creates is somewhere between a dinner roll and a pizza crust, which is exactly what you want here. I've tried making these with regular yogurt and they fall apart, and with just flour and water they're dense and sad, so there's definitely something special happening with the Greek version.
Why the Knot Shape Matters
Beyond looking fancy, tying them into knots actually serves a purpose—it creates natural pockets where the garlic butter pools and soaks in, and the folded-over ends protect the cheese from leaking out the sides. The shape also means more surface area for crisping up, which is why you get those golden edges that are almost caramelized. When I first made these, I tried just rolling them into spirals because I thought knots were too fussy, and they looked sad and collapsed during baking.
Storage and Make-Ahead Magic
These are genuinely better straight from the oven, but you can absolutely assemble them ahead and refrigerate unbaked for up to a day, then just add a couple extra minutes to the baking time. I've also frozen the unbaked knots on a sheet and then stored them in a bag, which means you can bake just a few whenever the craving hits.
- Let leftovers cool completely before storing them in an airtight container, or they'll get soggy from condensation.
- Reheat in a 350°F oven for about 5 minutes to restore some crispness instead of the microwave, which makes them rubbery.
- They keep for about 3 days in the fridge, though honestly they rarely last that long once people discover them.
 Save
Save  Save
Save These knots prove that sometimes the best food moments come from accident and curiosity rather than following someone else's vision. They're the kind of thing you make for yourself on a random Tuesday and suddenly become your signature move at parties.
Recipe FAQs
- → Can I make the dough ahead of time?
Yes, prepare the dough and store it wrapped in plastic in the refrigerator for up to 24 hours. Let it come to room temperature for about 15 minutes before rolling and stuffing.
- → What other fillings work well?
Try cooked Italian sausage, spinach and ricotta, sun-dried tomatoes, or different cheese varieties like provolone or cheddar. Vegetarians can use sautéed mushrooms or bell peppers.
- → Can I freeze these garlic knots?
Bake the knots completely, let cool, then freeze in an airtight container for up to 3 months. Reheat in a 350°F oven for 10-12 minutes and brush with fresh garlic butter before serving.
- → Why use self-rising flour?
Self-rising flour contains the perfect ratio of leavening and salt already blended in, making the dough quick and foolproof. If you only have all-purpose flour, add 1 ½ tsp baking powder and ½ tsp salt per cup.
- → How do I know when the knots are done?
The knots should be golden brown on top and the dough should feel firm when gently pressed. The internal temperature should reach 190-200°F for fully cooked dough throughout.