 Save
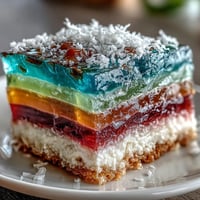
Save My neighbor Sarah showed up at a Fourth of July potluck with these impossibly perfect red, white, and blue Jello cups, and I watched them disappear faster than the fireworks that night. She caught me staring and laughed, handing me one with a conspiratorial wink, then whispered the secret was patience and not jiggling the fridge. That evening, sitting on her back porch with the cup sweating in my hand, I realized how something so simple could feel like edible celebration. Now whenever I make them, I think of her terrible jokes and the way her kitchen always smells like possibility.
I made these for my daughter's school potluck last summer, and the teacher texted me asking if they were homemade because everyone assumed I'd bought them from a fancy bakery. That small moment of pride while standing in the kitchen at 6 AM, arranging berries on top, reminded me why I love cooking for other people.
Ingredients
- Strawberry or cherry flavored Jello (3 oz box): This is your red foundation, and using real flavored packets gives you control over the color intensity that bottled versions sometimes lack.
- Boiling water (1 cup for red, 1 cup for blue): Boiling water dissolves gelatin properly without leaving grainy texture that lukewarm water creates.
- Cold water (1/2 cup for red, 1/2 cup for blue): This cools the Jello just enough so it sets cleanly without becoming rubbery.
- Unflavored gelatin (1 envelope): The white layer's backbone, and blooming it first prevents lumps that will ruin your pristine middle stripe.
- Sweetened condensed milk (1 cup): This creates that creamy, opaque white layer that makes the contrast pop visually and adds richness you don't expect in gelatin.
- Blue raspberry flavored Jello (3 oz box): The grand finale, and blue raspberry tastes surprisingly good when you're not overthinking it.
- Whipped cream and fresh berries (optional garnish): These final touches transform dessert into something that looks like it belongs at a celebration.
Tired of Takeout? 🥡
Get 10 meals you can make faster than delivery arrives. Seriously.
One email. No spam. Unsubscribe anytime.
Instructions
- Set Up Your Canvas:
- Grab eight clear cups and arrange them where they'll live in the fridge undisturbed. Clear cups matter here because half the magic is watching those colors layer as you work.
- Create the Red Layer:
- Pour boiling water over strawberry Jello and stir until every granule disappears, then add cold water. Divide evenly between cups, then here's the trick: tilt each cup slightly in a muffin tin and chill for 45 to 60 minutes until it jiggles just slightly but holds its shape when you nudge it.
- Bloom and Build the White Layer:
- Sprinkle gelatin over cold water like you're seasoning something, let it sit for five minutes until it looks like wet sand, then add boiling water and stir until silky. Cool this completely before touching it or you'll melt your red layer beneath it.
- Pour the White Layer:
- Once red is set, straighten your cups and pour white mixture slowly and gently down the side of each cup, giving it a moment to settle before moving to the next one. Refrigerate for 45 to 60 minutes until it firms up.
- Prepare and Add Blue:
- Make blue Jello the same way as red, cool it slightly, then pour it as gently as you poured the white layer. This final chill needs at least two hours, but overnight is safer if you're not in a rush.
- The Grand Finale:
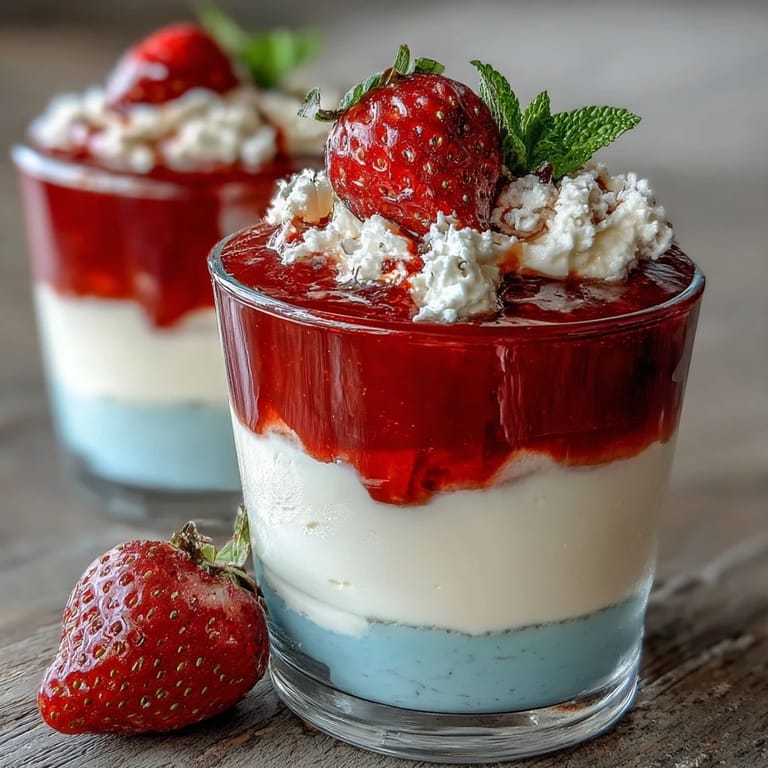
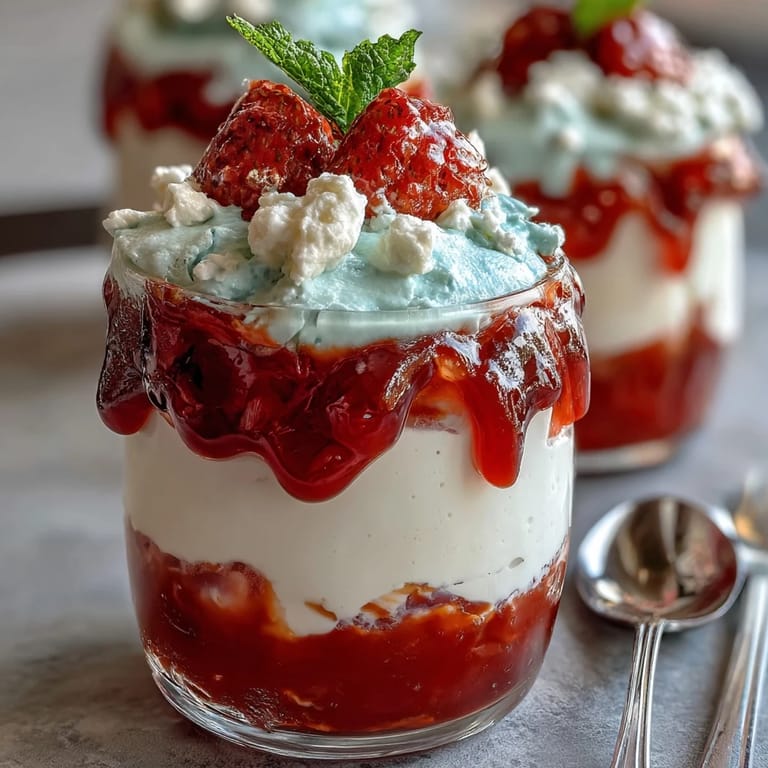
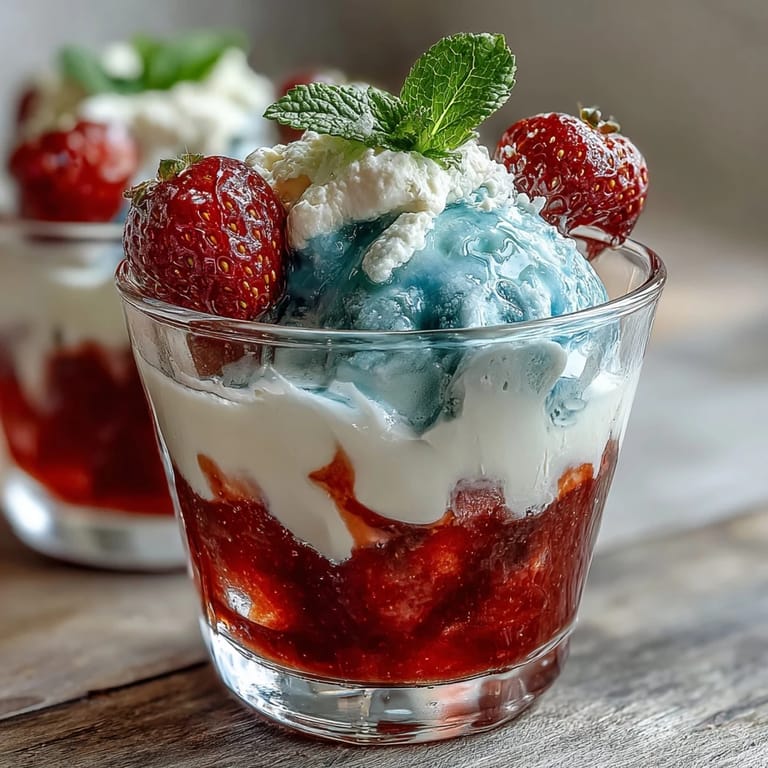
- Right before serving, top each cup with a small dollop of whipped cream and scatter fresh berries on top so it looks as good as it tastes.
 Save
Save These cups somehow turned a simple summer meal into an occasion worth remembering, the kind of dessert that makes people linger at the table longer than they planned. There's something about eating something beautiful that makes conversation happen naturally.
Timing Is Everything
The hardest part isn't the technique, it's the waiting. I learned to prep these the night before when I'm not watching the clock, because the moment you start checking every five minutes, time moves backward. Make them when you have other things to do, and they'll be ready exactly when you need them.
Flavor Swaps That Work
You're not locked into strawberry and blue raspberry just because that's patriotic. I've made versions with lime and cherry, orange and grape, even watermelon and coconut when I wanted something more summery than festive. The only rule is that your colors should contrast enough that you can actually see the layers.
Making Them Dairy-Free
If your guests avoid dairy, coconut milk with a tablespoon of sugar creates a white layer that's just as creamy and honestly tastes lighter on the palate. You might need to add a tiny bit more gelatin since coconut milk behaves slightly differently than condensed milk, but the effect is nearly identical.
- Let coconut milk settle before measuring if it's separated in the can.
- Taste the white mixture before chilling to make sure the sweetness balances with your fruit layers.
- This version actually sets slightly firmer, which means you can transport these without worry.
 Save
Save These Jello cups are proof that sometimes the most impressive things are also the most straightforward, requiring nothing but ingredients, patience, and a little care. They'll become your go-to celebration dessert, the kind people ask you to bring back.
Recipe FAQs
- → How do I get clean, distinct layers in the Jello cups?
Allow each layer to fully set and chill before adding the next. Pour layers gently to avoid mixing colors.
- → Can I swap flavors for the red and blue layers?
Yes, feel free to use different berry flavors or other gelatin varieties to customize the colors and tastes.
- → Is there a dairy-free option for the creamy white layer?
Substitute the sweetened condensed milk with coconut milk and sugar to make it dairy-free while maintaining creaminess.
- → What tools will help with the angled chilling of the layers?
A muffin tin can be used to hold cups at a slight angle during chilling for sharp layers and neat presentation.
- → How long should each layer chill before adding the next?
Each layer typically chills for 45–60 minutes until fully set before pouring the next layer on top.
- → Can I prepare the Jello cups ahead of time?
Yes, these cups can be prepared in advance and kept refrigerated for several hours before serving.